8 月 . 16, 2024 18:55 Back to list
Steps to Install a T-Bar Ceiling Grid Efficiently and Effectively
How to Install a T-Bar Ceiling Grid A Step-by-Step Guide
Installing a T-bar ceiling grid can seem like a daunting task, but with the right tools and some careful planning, you can easily transform your space while enhancing its aesthetic appeal and functionality. This guide will walk you through the process step by step, ensuring you have all the information you need to successfully install a T-bar ceiling grid.
Materials Needed
Before you start, gather the following materials and tools
1. T-bar ceiling grid components main runners, cross tees, and ceiling tiles. 2. Measuring tape. 3. Level. 4. Chalk line. 5. Saw (or wire-cutting tool). 6. Drill with appropriate bits. 7. Suspension wire (for securing the grid). 8. Safety goggles and gloves.
Step 1 Planning
Begin by planning your layout. Determine the dimensions of the area you want to install the ceiling grid in and how many tiles you will need based on your measurements. T-bar ceiling grids typically consist of main runners that run the length of the room and cross tees that create a grid structure.
Marking the Height
Once you have your measurements, decide how low you want your ceiling to be. Mark this height on the walls around the room using a chalk line. This line will act as your reference point for installing the main runners.
Step 2 Installing the Main Runners
1. Attach Hangers Starting at one end of the room, attach the ceiling hangers to the ceiling joists or the structure above using your drill. Make sure you space these hangers roughly 4 feet apart for adequate support.
2. Position the Main Runners Using the chalk line as a guide, position your main runners parallel to the longest wall (make sure it’s level).
3. Secure the Runners Attach the main runners to the hangers using wire or screws, ensuring they are level. Repeat this process until all main runners are positioned.
Step 3 Adding Cross Tees
how to install t-bar ceiling grid

After the main runners are securely in place, it’s time to add the cross tees
.1. Determine Spacing Decide how many cross tees you will need based on the size of your ceiling tiles (usually 2x2 or 2x4). Space them evenly along the main runners.
2. Install the Cross Tees Insert the cross tees into the slots of the main runners, ensuring they fit snugly. Continue this until the entire grid structure is complete.
Step 4 Installing the Ceiling Tiles
Now that your grid is in place, it’s time to install the ceiling tiles.
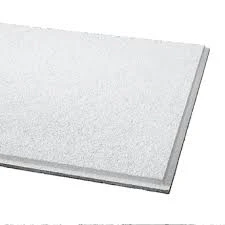
1. Placing Tiles Starting at one corner of the room, lift the ceiling tile into the grid, positioning it carefully so it fits within the frame. Gently nudge it until it sits evenly.
2. Finish Tiling Continue placing tiles throughout the grid, checking each time that they are level and aligned with the surrounding tiles.
Step 5 Final Touches
After all tiles are installed, perform a final inspection
1. Check Alignment Ensure that all tiles are aligned correctly and the grid is evenly suspended.
2. Trim Edges If necessary, trim any edges of the tiles that might be exposed or protruding using a saw.
3. Clean Up Remove any debris from the installation process, and dispose of waste materials responsibly.
Conclusion
Installing a T-bar ceiling grid can greatly enhance the look and feel of a room while providing easy access to plumbing and electrical systems. By following these straightforward steps and taking your time, you can achieve a professional-looking result that adds value to your space. Remember to prioritize safety and take breaks as needed during the installation process. Enjoy your new ceiling!
-
Revolutionizing Interior Design with Ceilings t grid Suspended SystemNewsOct.29,2024
-
Revolutionizing Ceiling Design with ceiling access panel with Gypsum Tile WaterproofNewsOct.29,2024
-
Revolutionizing Interior Design with PVC Gypsum Ceiling: A Comprehensive GuideNewsOct.29,2024
-
Elevating Interior Design with High quality Mineral Fiber Ceiling TilesNewsOct.29,2024
-
Revolutionizing Interior Design with PVC Gypsum Ceiling: A Comprehensive GuideNewsOct.29,2024
-
Elevating Interior Design with High-Quality Mineral Fiber Ceiling Tiles: A Comprehensive GuideNewsOct.29,2024


