


2 月 . 14, 2025 18:54 Back to list
Ceilings t grid Suspended System
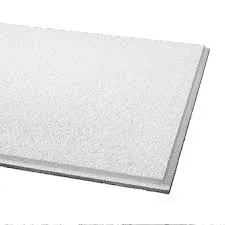
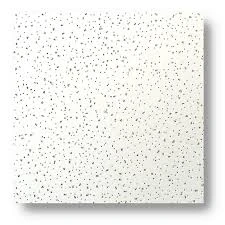
Embarking on the journey of installing a drop ceiling grid may seem daunting, but with careful planning and expert guidance, it can be a rewarding endeavor, transforming your space with style and functionality. A drop ceiling, often referred to as a suspended ceiling, offers an efficient way to conceal unsightly pipes, wiring, and other infrastructure, while providing sound absorption and a clean aesthetic.
Subsequently, cross tees are integrated into the main tees, creating a series of grid squares. The precision of this step defines the structural integrity and appearance of your drop ceiling. Regularly check alignment with a laser level, adjusting to maintain straight lines and right angles, crucial for aesthetic balance and stability. Once the grid is in place, fitting the ceiling tiles becomes the final step. Depending on your design choice, tiles may vary in size and style, allowing for creative expression in each installation. Handle tiles with care to prevent damage or scuffing. Install them methodically, ensuring each tile fits snugly into the grid. Attention to detail is vital throughout this process, from acquiring the best-fitting tiles to the consistent checking of level and alignment. While DIY installations are feasible, enlisting the help of a professional offers benefits such as an expert eye for precision, access to better quality materials, and adherence to optimal safety standards. In reflecting on this experience, remember that the success of laying out a drop ceiling grid hinges on preparation and precision. With the right approach, this project not only enhances the appearance of your space but also boosts the interior acoustics and utility. By trusting in expert techniques and reliable materials, your drop ceiling installation will stand the test of time, adding value and beauty to your home or office.
Subsequently, cross tees are integrated into the main tees, creating a series of grid squares. The precision of this step defines the structural integrity and appearance of your drop ceiling. Regularly check alignment with a laser level, adjusting to maintain straight lines and right angles, crucial for aesthetic balance and stability. Once the grid is in place, fitting the ceiling tiles becomes the final step. Depending on your design choice, tiles may vary in size and style, allowing for creative expression in each installation. Handle tiles with care to prevent damage or scuffing. Install them methodically, ensuring each tile fits snugly into the grid. Attention to detail is vital throughout this process, from acquiring the best-fitting tiles to the consistent checking of level and alignment. While DIY installations are feasible, enlisting the help of a professional offers benefits such as an expert eye for precision, access to better quality materials, and adherence to optimal safety standards. In reflecting on this experience, remember that the success of laying out a drop ceiling grid hinges on preparation and precision. With the right approach, this project not only enhances the appearance of your space but also boosts the interior acoustics and utility. By trusting in expert techniques and reliable materials, your drop ceiling installation will stand the test of time, adding value and beauty to your home or office.
Latest news
-
Revolutionizing Interior Design with Ceilings t grid Suspended SystemNewsOct.29,2024
-
Revolutionizing Ceiling Design with ceiling access panel with Gypsum Tile WaterproofNewsOct.29,2024
-
Revolutionizing Interior Design with PVC Gypsum Ceiling: A Comprehensive GuideNewsOct.29,2024
-
Elevating Interior Design with High quality Mineral Fiber Ceiling TilesNewsOct.29,2024
-
Revolutionizing Interior Design with PVC Gypsum Ceiling: A Comprehensive GuideNewsOct.29,2024
-
Elevating Interior Design with High-Quality Mineral Fiber Ceiling Tiles: A Comprehensive GuideNewsOct.29,2024


