


2 月 . 15, 2025 18:59 Back to list
installing acoustical ceiling grid
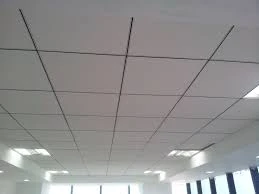
Installing an acoustical ceiling grid requires a blend of precision, expertise, and attention to detail. This task, while seemingly straightforward, involves various steps to ensure effective sound control and aesthetic appeal. With years of experience in architectural acoustics and construction, I will guide you through the essential aspects of installing an acoustical ceiling grid, emphasizing the importance of each stage for successful implementation.
Installation Techniques Commence the installation process by attaching wall moldings using screws or nails, ensuring they are level. Next, install the main tees and cross tees. It's crucial to maintain a consistent suspension spacing, typically every four feet, which supports the grid efficiently. Secure the grid using hanger wires attached to the main tees, preserving the integrity of the ceiling structure. Each tee should interlock securely to prevent sagging or misalignment. Pay attention to detail as each element contributes to the ceiling's overall stability. Incorporating Lighting and Fixtures One often overlooked aspect of acoustical ceiling installation is incorporating lighting and other fixtures. Proper integration requires pre-measured cutouts to accommodate lighting fixtures without compromising the ceiling's integrity. Opt for lightweight fixtures to reduce stress on the grid. Ensure the electrical work adheres to safety standards and is executed by certified professionals. This not only ensures effectiveness but also enhances the room’s aesthetic appeal. Post-Installation Checks and Maintenance After completing the installation, conduct a thorough inspection to confirm the grid is level and secure. Check for tile uniformity and the secure fitting of fixtures. Maintenance is key to prolonging the life of your acoustical ceiling. Regularly inspect the ceiling for signs of moisture or damage, which could lead to mold or structural compromise. Clean acoustic tiles routinely to maintain their sound-absorbing capabilities and aesthetic look. Conclusion Installing an acoustical ceiling grid integrates artistry with engineering. The synergy between selecting the right materials, precise measurement, accurate installation, and effective integration of fixtures leads to a ceiling that not only enhances acoustics but elevates design. Trust in the process and expertise ensures a professional finish, gaining the satisfaction of enhanced sound quality and an appealing environment. Whether for a corporate office, home theater, or concert hall, the meticulous installation of an acoustical ceiling grid redefines the acoustic and aesthetic standards of any space.

Installation Techniques Commence the installation process by attaching wall moldings using screws or nails, ensuring they are level. Next, install the main tees and cross tees. It's crucial to maintain a consistent suspension spacing, typically every four feet, which supports the grid efficiently. Secure the grid using hanger wires attached to the main tees, preserving the integrity of the ceiling structure. Each tee should interlock securely to prevent sagging or misalignment. Pay attention to detail as each element contributes to the ceiling's overall stability. Incorporating Lighting and Fixtures One often overlooked aspect of acoustical ceiling installation is incorporating lighting and other fixtures. Proper integration requires pre-measured cutouts to accommodate lighting fixtures without compromising the ceiling's integrity. Opt for lightweight fixtures to reduce stress on the grid. Ensure the electrical work adheres to safety standards and is executed by certified professionals. This not only ensures effectiveness but also enhances the room’s aesthetic appeal. Post-Installation Checks and Maintenance After completing the installation, conduct a thorough inspection to confirm the grid is level and secure. Check for tile uniformity and the secure fitting of fixtures. Maintenance is key to prolonging the life of your acoustical ceiling. Regularly inspect the ceiling for signs of moisture or damage, which could lead to mold or structural compromise. Clean acoustic tiles routinely to maintain their sound-absorbing capabilities and aesthetic look. Conclusion Installing an acoustical ceiling grid integrates artistry with engineering. The synergy between selecting the right materials, precise measurement, accurate installation, and effective integration of fixtures leads to a ceiling that not only enhances acoustics but elevates design. Trust in the process and expertise ensures a professional finish, gaining the satisfaction of enhanced sound quality and an appealing environment. Whether for a corporate office, home theater, or concert hall, the meticulous installation of an acoustical ceiling grid redefines the acoustic and aesthetic standards of any space.
Latest news
-
Revolutionizing Interior Design with Ceilings t grid Suspended SystemNewsOct.29,2024
-
Revolutionizing Ceiling Design with ceiling access panel with Gypsum Tile WaterproofNewsOct.29,2024
-
Revolutionizing Interior Design with PVC Gypsum Ceiling: A Comprehensive GuideNewsOct.29,2024
-
Elevating Interior Design with High quality Mineral Fiber Ceiling TilesNewsOct.29,2024
-
Revolutionizing Interior Design with PVC Gypsum Ceiling: A Comprehensive GuideNewsOct.29,2024
-
Elevating Interior Design with High-Quality Mineral Fiber Ceiling Tiles: A Comprehensive GuideNewsOct.29,2024


