10 月 . 12, 2024 09:13 Back to list
Creating an Easy Access Panel for Your Ceiling Installation Guide
How to Make a Ceiling Access Panel A Step-by-Step Guide
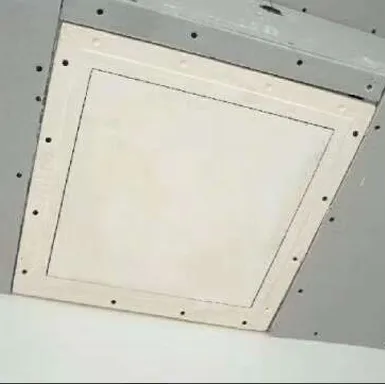
Creating a ceiling access panel can be an essential home improvement project, especially if you need easy access to hidden plumbing, electrical wiring, or attic spaces. An access panel allows for convenient entry without causing damage to your ceiling. Here’s a step-by-step guide to help you successfully make your own ceiling access panel.
Materials Needed
1. Plywood or drywall 2. Wooden frame (2x2 or 2x4 lumber) 3. Measuring tape 4. Level 5. Saw (circular or jigsaw) 6. Screwdriver 7. Hinges 8. Latch (optional) 9. Paint or finishing material (if desired) 10. Safety goggles and gloves
Step 1 Determine the Location
Before you start, decide where you want the access panel. Common locations are above light fixtures, between joists in the ceiling, or directly above areas that require maintenance. Ensure that the location does not interfere with any critical structural components.
Step 2 Measure and Mark
Using a measuring tape, determine the size of the access panel you want to create. Standard sizes are usually 12x12 inches or 14x14 inches, but you can customize this based on your needs. Mark the outline on the ceiling with a pencil. Use a level to ensure your lines are straight.
Step 3 Cut out the Opening
Once marked, it’s time to cut out the opening. Use a stud finder to locate the ceiling joists. Cut carefully along your marked lines using a circular saw or jigsaw. Ensure you’re wearing safety goggles to protect your eyes from flying debris. Be cautious not to cut into any wiring or plumbing.
Step 4 Build the Frame
how to make ceiling access panel

To support the access panel, build a frame out of 2x2 or 2x4 lumber. Cut the lumber to fit inside the opening you’ve created and attach it securely. You may need to screw the frame to the ceiling joists to ensure stability. This frame will act as a support system for the panel when it is installed.
Step 5 Create the Access Panel
Using plywood or drywall, cut a piece that matches the dimensions of your access panel. The panel should fit snugly within the frame you’ve created. Sand the edges to ensure a smooth finish. If you opted for a plywood panel, you may wish to paint it to match your ceiling for a seamless look.
Step 6 Attach the Hinges
Attach your panel to the frame using hinges. Position the hinges on one side of the panel, making sure it can swing open easily. If desired, you can add a latch on the opposite side to keep it securely closed when not in use. Ensure that the panel is level and fits well within the frame before finalizing the hinge installation.
Step 7 Finishing Touches
If you used plywood, finish the panel with paint or a suitable finish to blend it seamlessly into your ceiling. This will create a polished look and ensure it matches your home’s décor. Be sure to let the paint dry completely before using the access panel.
Step 8 Final Inspection
After everything is completed, conduct a final inspection. Ensure all screws are tight, the panel swings easily, and the latch functions as intended. This step is crucial to ensure safe and efficient access to your ceiling space.
In conclusion, making a ceiling access panel is a straightforward project that requires basic tools and materials. Once completed, it will provide you with easy access to vital areas of your home without causing significant structural changes. With a little effort, you can enhance both the functionality and accessibility of your living space.
-
Revolutionizing Interior Design with Ceilings t grid Suspended SystemNewsOct.29,2024
-
Revolutionizing Ceiling Design with ceiling access panel with Gypsum Tile WaterproofNewsOct.29,2024
-
Revolutionizing Interior Design with PVC Gypsum Ceiling: A Comprehensive GuideNewsOct.29,2024
-
Elevating Interior Design with High quality Mineral Fiber Ceiling TilesNewsOct.29,2024
-
Revolutionizing Interior Design with PVC Gypsum Ceiling: A Comprehensive GuideNewsOct.29,2024
-
Elevating Interior Design with High-Quality Mineral Fiber Ceiling Tiles: A Comprehensive GuideNewsOct.29,2024


