10 月 . 31, 2024 13:17 Back to list
Guide to Installing T-Bar Ceiling Grid for Your Home Renovation Project
How to Install a T-Bar Ceiling Grid
Installing a T-bar ceiling grid can significantly enhance the look of a room while providing a practical solution for concealed wiring and lighting fixtures. Here’s a step-by-step guide to help you install a T-bar ceiling grid efficiently.
Materials Needed - T-bar ceiling grid components (main runners, cross tees) - Ceiling tiles - Measuring tape - Chalk line - Level - Hacksaw - Wire hangers - Screwdriver - Safety goggles - Ladder
Step 1 Plan Your Layout Before starting, it’s essential to plan your ceiling design. Measure the room to determine the total area and decide how many tiles you’ll need. Most standard ceiling tiles are 2x2 feet or 2x4 feet, so you’ll need to calculate how many rows and columns of tiles will fit in your space.
Step 2 Mark the Starting Line Using your chalk line, mark a straight line on the wall where you want the bottom of the T-bar ceiling to sit. This is typically a few inches below the existing ceiling to allow space for the grid framework.
how to install t bar ceiling grid

Step 3 Install the Main Runners Begin by installing the main runners. These are the long metal strips that run the length of the room. Use a level to ensure they are straight. Secure the main runners to the ceiling using wire hangers at regular intervals (usually every 4 feet). Use a hacksaw to cut the runners to the right length if necessary.
Step 4 Add the Cross Tees Once the main runners are in place, it’s time to install the cross tees. These are the shorter strips that connect to the main runners, forming a grid. Space them according to the size of your ceiling tiles – generally, the cross tees should match the tile dimensions, creating uniform squares or rectangles in the grid. Again, ensure they are level.
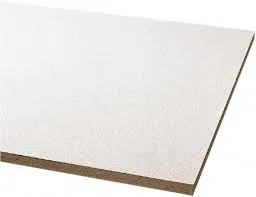
Step 5 Insert the Ceiling Tiles With the grid structure complete, carefully insert the ceiling tiles into the openings of the T-bar grid. Make sure they fit snugly and are flush with the grid, creating a seamless appearance.
Step 6 Final Touches After all tiles are in place, inspect the ceiling for any loose tiles and make adjustments if necessary. You can also add additional lighting fixtures by cutting through the tiles where required and securing them in place.
Conclusion Installing a T-bar ceiling grid can be a manageable DIY project that transforms the aesthetics of a room. Following these steps carefully will ensure a professional-looking result. Always prioritize safety by wearing goggles and using sturdy ladders during the installation process. Enjoy your newly revamped ceiling!
-
Revolutionizing Interior Design with Ceilings t grid Suspended SystemNewsOct.29,2024
-
Revolutionizing Ceiling Design with ceiling access panel with Gypsum Tile WaterproofNewsOct.29,2024
-
Revolutionizing Interior Design with PVC Gypsum Ceiling: A Comprehensive GuideNewsOct.29,2024
-
Elevating Interior Design with High quality Mineral Fiber Ceiling TilesNewsOct.29,2024
-
Revolutionizing Interior Design with PVC Gypsum Ceiling: A Comprehensive GuideNewsOct.29,2024
-
Elevating Interior Design with High-Quality Mineral Fiber Ceiling Tiles: A Comprehensive GuideNewsOct.29,2024


