9 月 . 29, 2024 08:10 Back to list
Guide to Installing T-Bar Ceiling Grid Easily and Effectively
How to Install a T-Bar Ceiling Grid
Installing a T-bar ceiling grid is a straightforward process that can enhance the aesthetics and functionality of any room. Whether you are creating a drop ceiling in your basement, office, or other spaces, following a systematic approach will ensure the installation is both efficient and successful. This article will guide you through the essential steps for installing a T-bar ceiling grid.
Tools and Materials Needed
Before you begin, gather the necessary tools and materials
- T-bar ceiling grid system (main tees, cross tees, and wall angles) - Ceiling tiles - Measuring tape - Level - Chalk line - Drill - Screwdriver - Wire cutters - Safety goggles - Ladder - Fasteners (screws and anchors)
Step 1 Plan Your Ceiling Grid Layout
The first step in installing a T-bar ceiling grid is to plan your layout. Measure the dimensions of the room and decide on the height at which you want to install the ceiling. A standard drop ceiling is usually 8 feet high, but you can adjust it based on your preference or any ductwork that needs to remain accessible.
Mark the corners of your layout on the walls using a pencil. Next, use a measuring tape to determine where the wall angle will be placed. The wall angle will typically be installed parallel to the floor, so use a level to ensure it is straight.
Step 2 Install the Wall Angles
Using the marked lines, fasten the wall angles to the wall using screws and anchors. Make sure the wall angle is aligned properly, as it's crucial for the overall grid's alignment. The wall angles will act as tracks for the main tees, so any inaccuracies can lead to an uneven installation.
Step 3 Install the Main Tees
Once the wall angles are installed, it’s time to install the main tees. These are the long pieces that will run the length of the room. Start at one end and place the main tee into the wall angle, ensuring it sits flush against it.
Continue placing the main tees along the marked layout. They should be spaced 4 feet apart, which is standard for most ceiling tile systems. Use your level to ensure each main tee is horizontal. If any adjustments are needed, do so before securing them in place.
Step 4 Install the Cross Tees
how to install t bar ceiling grid

With the main tees secured, you can now install the cross tees. These pieces will fit perpendicular to the main tees and should be installed every 2 feet, creating a grid. Insert the cross tees into the main tees, making sure they fit securely.
Use a level to check that both the main and cross tees are aligned properly. Adjust as necessary before securing them in place.
Step 5 Install the Hangers
To provide additional support for the ceiling grid, install ceiling tile hangers. These are usually wire hangers that will help stabilize the grid and prevent sagging. Attach the hangers from the main tees to the ceiling joists above.
Make sure the hangers are evenly spaced—typically every 4 feet along the main tees—to provide adequate support.
Step 6 Insert the Ceiling Tiles
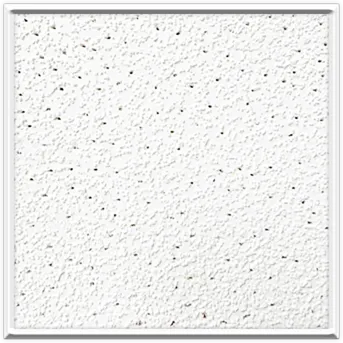
Now that your grid is complete, it’s time to install the ceiling tiles. Carefully lift each tile and place it into the grid. Start from one corner and work your way across the room. Ensure each tile is seated properly in the grid and is flush with adjacent tiles.
If you encounter any obstructions (like light fixtures or vents), measure the openings and cut the tiles accordingly using a utility knife.
Step 7 Final Touches
Once all the tiles are installed, take a step back and inspect your work. Check for any tiles that might need adjustment or alignment. Make sure all tiles are secure and that the grid is well-supported.
Lastly, clean up the area, and you may consider painting the edges of the tiles or the wall angle for a polished look.
Conclusion
Installing a T-bar ceiling grid can seem daunting at first, but with the right tools, materials, and a clear plan, it can be an enjoyable DIY project. By following these detailed steps, you can transform your space with a functional and attractive drop ceiling that enhances the overall appearance of your room. Happy installing!
-
Revolutionizing Interior Design with Ceilings t grid Suspended SystemNewsOct.29,2024
-
Revolutionizing Ceiling Design with ceiling access panel with Gypsum Tile WaterproofNewsOct.29,2024
-
Revolutionizing Interior Design with PVC Gypsum Ceiling: A Comprehensive GuideNewsOct.29,2024
-
Elevating Interior Design with High quality Mineral Fiber Ceiling TilesNewsOct.29,2024
-
Revolutionizing Interior Design with PVC Gypsum Ceiling: A Comprehensive GuideNewsOct.29,2024
-
Elevating Interior Design with High-Quality Mineral Fiber Ceiling Tiles: A Comprehensive GuideNewsOct.29,2024


