8 月 . 20, 2024 17:47 Back to list
How to Install Drop Ceiling T-Bar Brackets for Easy Ceiling Grid Setup
Understanding Drop Ceiling T-Bar Brackets A Comprehensive Guide
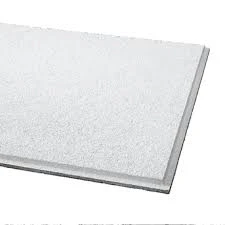
Drop ceilings, also known as suspended ceilings, are a popular choice for both residential and commercial spaces. They provide a functional barrier that conceals electrical wiring, plumbing, and HVAC systems, while also offering opportunities for aesthetic enhancement. A crucial component of any drop ceiling system is the T-bar bracket, which plays a vital role in the installation and stability of the grid system that supports the ceiling tiles. In this article, we will explore the importance of drop ceiling T-bar brackets, their types, and some installation tips.
What is a Drop Ceiling T-Bar Bracket?
A drop ceiling T-bar bracket is a metal or plastic clip that connects the main T-bars or grid components of a suspended ceiling. These brackets are essential for maintaining the structure and alignment of the ceiling. They secure the T-bars to the wall or to the ceiling joists, ensuring that the entire system remains stable and level over time. The use of T-bar brackets not only supports the tiles but also makes it easier to remove and replace tiles when maintenance is necessary.
Types of T-Bar Brackets
There are several types of T-bar brackets available, each designed for specific applications
1. Basic T-Bar Brackets These are standard brackets that secure the T-bar grid to the building structure. They are typically L-shaped and made from sturdy metal to support the weight of the ceiling tiles.
2. Cross Tee Brackets These brackets connect the main T-bars to the cross tees, which are the perpendicular bars that hold the ceiling tiles in place. Cross tee brackets are crucial for maintaining the square grid shape of the drop ceiling.
3. Angle Brackets These are used when the drop ceiling is installed at an angle or in a sloped area. Angle brackets provide additional support and help maintain the proper alignment of the ceiling grid.
4. Adjustable Brackets These are versatile brackets that allow for height adjustments during installation. They are particularly useful in situations where the ceiling height may vary in different areas of a room.
drop ceiling t bar bracket

Installation Tips
Installing a drop ceiling with T-bar brackets may seem daunting, but with careful planning and execution, it can be a straightforward process. Here are some installation tips
1. Planning Before beginning the installation, it's essential to measure the room accurately and plan the layout of the T-bar grid. Ensure that the grid will be level and that the tiles will fit properly.
2. Spacing When installing T-bar brackets, maintain consistent spacing for maximum stability. Follow the manufacturer’s guidelines for spacing between brackets, as this can affect the overall durability of the ceiling.
3. Securing to Joists For maximum support, secure T-bar brackets to ceiling joists rather than just the drywall. This will ensure that the grid can support the weight of the ceiling tiles without sagging.
4. Check for Level As you install the grid, constantly check for level using a laser leveling tool. An even grid will facilitate a neater finish and reduce the likelihood of tiles becoming dislodged over time.
5. Final Inspection After installation, inspect the T-bar grid to ensure everything is secure. Look for any loose brackets or misalignment that may need correction before the tiles are added.
Conclusion
In conclusion, drop ceiling T-bar brackets are essential components of a suspended ceiling system, providing support, alignment, and stability. By understanding the different types of brackets and following proper installation techniques, you can ensure that your drop ceiling is not only functional but also aesthetically pleasing. Whether you are a DIY enthusiast or a seasoned contractor, mastering the use of T-bar brackets will enhance the longevity and quality of your suspended ceiling project.
-
Revolutionizing Interior Design with Ceilings t grid Suspended SystemNewsOct.29,2024
-
Revolutionizing Ceiling Design with ceiling access panel with Gypsum Tile WaterproofNewsOct.29,2024
-
Revolutionizing Interior Design with PVC Gypsum Ceiling: A Comprehensive GuideNewsOct.29,2024
-
Elevating Interior Design with High quality Mineral Fiber Ceiling TilesNewsOct.29,2024
-
Revolutionizing Interior Design with PVC Gypsum Ceiling: A Comprehensive GuideNewsOct.29,2024
-
Elevating Interior Design with High-Quality Mineral Fiber Ceiling Tiles: A Comprehensive GuideNewsOct.29,2024


