8 月 . 15, 2024 04:05 Back to list
How to Effectively Install an Access Panel in Your Ceiling for Easy Maintenance
Installing an Access Panel in the Ceiling A Step-by-Step Guide
Access panels are essential features often overlooked in construction and renovation projects. They provide a convenient means for accessing plumbing, electrical components, or other critical systems behind walls or ceilings without compromising the overall aesthetic of a space. Installing an access panel in the ceiling can be a straightforward process if approached methodically. This article will guide you through the steps needed to install an access panel effectively.
1. Choose the Right Access Panel
Before beginning the installation, it's crucial to select the appropriate access panel. These panels come in different materials, sizes, and styles. For ceilings, you may want to opt for a metal panel, which is durable and often comes with a hinge and latch system for easy access. Be sure to measure the area where you want to install the panel to ensure a proper fit.
2. Gather the Necessary Tools and Materials
To install the access panel, you’ll need several tools and materials, such as
- Tape measure - Level - Utility knife or drywall saw - Screwdriver - Drill - Screws (if not included with the panel) - Stud finder
Having these tools on hand will make the installation process smoother and help ensure a clean, professional-looking result
.3. Locate and Mark the Installation Area
Using a stud finder, locate any ceiling joists and mark their positions. It's essential to avoid these when cutting into the ceiling as it can cause structural damage. Once you have marked the joists, choose a spot that is free of obstructions for your access panel. Use the tape measure to mark the dimensions of the panel on the ceiling. Double-check these measurements to avoid mistakes before proceeding.
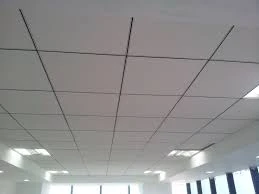
installing access panel in ceiling

4. Cut the Opening
After marking the panel's dimensions, it’s time to cut the opening. Use a utility knife or drywall saw to carefully cut along the marked lines. Make sure to wear protective eyewear and a dust mask during this step, as cutting can create flying debris. Take your time to ensure a clean cut, as this will result in a better fit for the access panel.
5. Test Fit the Panel
Before permanently securing the panel, insert it into the cut opening to ensure it fits correctly. Make any necessary adjustments to the opening if the panel does not fit snugly. Once satisfied with the fit, proceed to the next step.
6. Secure the Access Panel
With the access panel fitting properly, it’s time to secure it in place. Depending on the design, either use screws or adhesive to attach the panel to the surrounding ceiling material. If screws are required, pre-drill holes to avoid damaging the drywall. Ensure the panel operates smoothly, opening and closing without any obstructions.
7. Finishing Touches
To give your installation a polished look, consider painting or finishing the panel to match the ceiling. This step can help blend the access panel into the ceiling, making it less noticeable while still functional. It’s also a good idea to clean any dust or debris created during the installation process.
Conclusion
Installing an access panel in the ceiling is a practical solution for maintaining easy access to vital systems without sacrificing aesthetics. By carefully selecting the right panel, properly measuring and cutting, and ensuring a secure and clean installation, you can enhance the functionality of any space. Whether you are a seasoned DIY enthusiast or a first-time installer, following these steps can help you achieve a professional result that meets your needs.
-
Revolutionizing Interior Design with Ceilings t grid Suspended SystemNewsOct.29,2024
-
Revolutionizing Ceiling Design with ceiling access panel with Gypsum Tile WaterproofNewsOct.29,2024
-
Revolutionizing Interior Design with PVC Gypsum Ceiling: A Comprehensive GuideNewsOct.29,2024
-
Elevating Interior Design with High quality Mineral Fiber Ceiling TilesNewsOct.29,2024
-
Revolutionizing Interior Design with PVC Gypsum Ceiling: A Comprehensive GuideNewsOct.29,2024
-
Elevating Interior Design with High-Quality Mineral Fiber Ceiling Tiles: A Comprehensive GuideNewsOct.29,2024


