8 月 . 19, 2024 11:26 Back to list
How to Construct a Ceiling Access Panel for Easy Installation
Installing a Ceiling Access Panel A Comprehensive Guide
Installing a ceiling access panel is a practical solution for maintaining easy access to hidden spaces in your home, such as attics, plumbing, or electrical lines. These panels not only provide convenient access for repairs and inspections but also ensure that aesthetics are not compromised. This article will guide you through the process of installing a ceiling access panel, highlighting the necessary tools, steps, and tips to achieve a successful installation.
Why Install a Ceiling Access Panel?
Before diving into the installation process, it's essential to understand the benefits of having a ceiling access panel. Such panels allow homeowners and maintenance personnel to access critical areas without causing significant damage to the ceiling. This can save time and money when repairs or inspections are needed. They are particularly useful in homes with complicated electrical, plumbing, or HVAC systems that require regular maintenance.
Tools and Materials Needed
Before you begin the installation, gather the necessary tools and materials
1. Access Panel Choose a panel that fits your needs and matches your ceiling's aesthetics. Common options include drywall, plastic, or metal panels. 2. Measuring Tape Accurate measurements are crucial for proper installation. 3. Stud Finder To locate ceiling joists and avoid obstructing them. 4. Level Ensures that the panel is installed evenly. 5. Utility Knife or Drywall Saw Used to cut the ceiling material. 6. Drill and Screws For attaching the panel securely. 7. Safety Gear Wear safety goggles and a dust mask to protect yourself during installation.
Step-by-Step Installation Guide
1. Choose the Location Identify where the access panel will be installed. Ideally, it should be in a location that allows easy access while remaining inconspicuous. Make sure to avoid areas with electrical wiring, plumbing, or other obstructions.
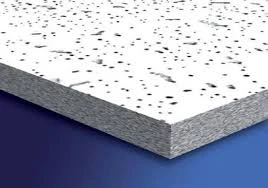
install ceiling access panel

2. Measure and Mark Use your measuring tape to determine the size of the access panel and mark the outline on the ceiling. If using a stud finder, locate and mark the ceiling joists to ensure the panel doesn’t interfere with them.
3. Cut the Opening Carefully use a utility knife or drywall saw to cut along the marked outline. Take your time to ensure a clean cut. If you encounter any obstacles, reassess your measurements and adjust accordingly.
4. Install the Panel Frame If your access panel comes with a frame, install it into the opening you created. Use a level to ensure it is straight. Secure the frame with screws, anchoring it into the surrounding ceiling material for stability.
5. Attach the Access Panel Once the frame is securely in place, locate the panel itself and attach it according to the manufacturer’s instructions. This may involve sliding it into place or securing it with additional screws.
6. Test the Access Panel Open and close the panel to ensure it functions smoothly. Make any necessary adjustments to ensure a snug fit.
7. Finishing Touches If needed, paint or finish the panel to match the surrounding ceiling. This step can enhance the aesthetics of your installation.
Conclusion
Installing a ceiling access panel can be a straightforward DIY project that adds convenience to your home. By following the steps outlined in this guide, homeowners can ensure that their access panel is correctly installed and seamlessly integrates into the ceiling design. With proper maintenance and occasional checks, your access panel will serve as a reliable entry point for any necessary repairs or inspections in the future. Whether you are a seasoned DIY enthusiast or a beginner, the right tools, materials, and approach will make this project achievable and rewarding.
-
Revolutionizing Interior Design with Ceilings t grid Suspended SystemNewsOct.29,2024
-
Revolutionizing Ceiling Design with ceiling access panel with Gypsum Tile WaterproofNewsOct.29,2024
-
Revolutionizing Interior Design with PVC Gypsum Ceiling: A Comprehensive GuideNewsOct.29,2024
-
Elevating Interior Design with High quality Mineral Fiber Ceiling TilesNewsOct.29,2024
-
Revolutionizing Interior Design with PVC Gypsum Ceiling: A Comprehensive GuideNewsOct.29,2024
-
Elevating Interior Design with High-Quality Mineral Fiber Ceiling Tiles: A Comprehensive GuideNewsOct.29,2024


