8 月 . 20, 2024 08:31 Back to list
Guide to Installing Ceiling Access Panels for Easy Maintenance and Access
Ceiling Access Panel Installation A Comprehensive Guide
Installing a ceiling access panel may seem like a straightforward task, but it requires attention to detail and proper technique to ensure functionality and aesthetic appeal. Access panels are pivotal for providing convenient entry to concealed areas, such as plumbing, electrical systems, and HVAC units, without compromising the structure's integrity. This guide will walk you through the essential steps and considerations for a successful ceiling access panel installation.
Understanding Access Panels
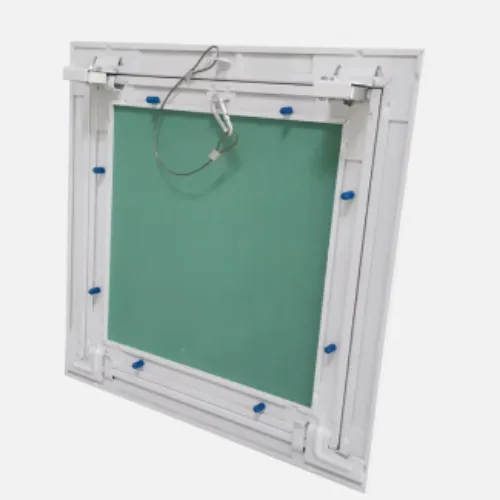
Access panels are framed openings in walls or ceilings that allow easy access to utility systems behind them. In ceilings, they are especially useful for areas that require maintenance or inspection but are otherwise difficult to reach. These panels come in various materials (like plastic, metal, or gypsum) and sizes, catering to different applications and aesthetic needs.
Tools and Materials Needed
Before initiating the installation, gather the necessary tools and materials, which typically include
- Ceiling access panel - Screwdriver or drill - Measuring tape - Level - Stud finder - Safety goggles - Utility knife - Pencil
Step-by-Step Installation Process
1. Select the Location Identify where the access panel will be installed. It should be in a location that allows easy access to the systems you need to reach, like ductwork or electrical junction boxes. Avoid placing it directly over appliances or fixtures for convenience.
ceiling access panel installation

2. Measure and Mark Use the measuring tape to determine the dimensions of the access panel and mark the area on the ceiling where it will be installed. Ensure that this area is clear of any obstructions. A level can help ensure your markings are straight, which is crucial for aesthetics.
3. Cut the Opening With a utility knife or drywall saw, carefully cut along the marked lines to create an opening for the access panel. Be cautious not to damage any electrical or plumbing systems in the process. If you've marked your cut accurately, the panel should fit snugly.
4. Install the Frame Some access panels come with a frame that needs to be secured to the ceiling. If so, use a stud finder to locate the ceiling joists and attach the frame with screws. Ensure it is level, as this will affect the appearance once the panel is installed.
5. Insert the Access Panel After securing the frame, place the access panel into the opening. Most panels are designed to fit snugly into the frame. Depending on the model, you may need to use screws or latches to secure it in place. Ensure it is flush with the ceiling to maintain a clean look.
6. Finishing Touches Once the panel is installed, you may want to paint it to match the ceiling, particularly if it has a different finish. Use a paint that suits the material of the panel. If there are gaps between the panel and the ceiling, they can be filled with caulking.
Final Checks
After installation, conduct a final check to ensure that the access panel opens easily and securely. Test the latches or securing mechanisms to ensure they function correctly. If necessary, make adjustments to ensure that the panel is aligned and operates smoothly.
Conclusion
Installing a ceiling access panel is a practical project that can save time and hassle when accessing essential systems within your property. By following these guidelines, you can ensure that your installation is both functional and aesthetically pleasing. Remember always to prioritize safety during installation, and consult a professional if you're unsure about any step in the process. With the right approach, a ceiling access panel can be a valuable addition to your home or workspace.
-
Revolutionizing Interior Design with Ceilings t grid Suspended SystemNewsOct.29,2024
-
Revolutionizing Ceiling Design with ceiling access panel with Gypsum Tile WaterproofNewsOct.29,2024
-
Revolutionizing Interior Design with PVC Gypsum Ceiling: A Comprehensive GuideNewsOct.29,2024
-
Elevating Interior Design with High quality Mineral Fiber Ceiling TilesNewsOct.29,2024
-
Revolutionizing Interior Design with PVC Gypsum Ceiling: A Comprehensive GuideNewsOct.29,2024
-
Elevating Interior Design with High-Quality Mineral Fiber Ceiling Tiles: A Comprehensive GuideNewsOct.29,2024


