


2 月 . 15, 2025 14:20 Back to list
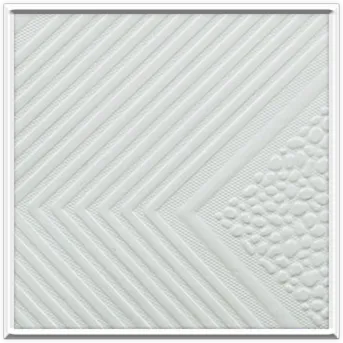
gridstone ceiling tile cost
Ceiling tile grid installation can be a transformative process for any space, optimizing both acoustics and aesthetics. Achieving a seamless and efficient installation demands a blend of expertise, practice, and precision. In this guide, you'll find insights rooted in experience, professional authority, and practical trust, ensuring you navigate each step with confidence.
Incorporating Fixtures and Fittings Integrating light fixtures or air vents requires precise cutting and fitting of tiles. Measure the fixture than transfer these dimensions onto the tile, using a tile cutter for sharp, clean edges. When using metal or fiberglass tiles, invest in quality cutting tools to avoid chipping or damage. For light fixtures, consider additional support to accommodate the extra weight. Tile Installation With the grid assembled and fittings accounted for, begin placing the tiles. Start at one corner, working your way across the ceiling. Tiles should slide effortlessly into place, resting atop the grid structure. For smaller, edge tiles, cut carefully to ensure tight, even margins against the wall. The final visual should be a seamless checkerboard with no noticeable gaps or misalignments. Quality Check Upon completion, double-check every tile and grid connection for stability. Ensure that tiles lay flat without bowing or tilting. An unsteady tile is indicative of a grid misalignment, which must be addressed immediately. Additionally, verify that all trims and fittings are flush, with no exposed edges or unfinished surfaces. Maintenance and Assurance Regular maintenance ensures the longevity and efficacy of your ceiling installation. Periodically dust the tiles and inspect the grid for any signs of wear or damage. For locations with high humidity, opt for moisture-resistant tiles and frames to prevent degradation over time. Should any panel or grid part become compromised, having spare materials on hand can facilitate swift replacements, maintaining your installation's pristine condition. Conclusion Mastering the ceiling tile grid installation process requires dedication and attention to detail. By methodically preparing and executing each phase, from product selection to final inspection, you can achieve a lasting and professional finish. Whether enhancing an office environment or revamping a residential space, each step furthers your expertise, bolstering your authority as a trusted advisor in interior architectural installations.

Incorporating Fixtures and Fittings Integrating light fixtures or air vents requires precise cutting and fitting of tiles. Measure the fixture than transfer these dimensions onto the tile, using a tile cutter for sharp, clean edges. When using metal or fiberglass tiles, invest in quality cutting tools to avoid chipping or damage. For light fixtures, consider additional support to accommodate the extra weight. Tile Installation With the grid assembled and fittings accounted for, begin placing the tiles. Start at one corner, working your way across the ceiling. Tiles should slide effortlessly into place, resting atop the grid structure. For smaller, edge tiles, cut carefully to ensure tight, even margins against the wall. The final visual should be a seamless checkerboard with no noticeable gaps or misalignments. Quality Check Upon completion, double-check every tile and grid connection for stability. Ensure that tiles lay flat without bowing or tilting. An unsteady tile is indicative of a grid misalignment, which must be addressed immediately. Additionally, verify that all trims and fittings are flush, with no exposed edges or unfinished surfaces. Maintenance and Assurance Regular maintenance ensures the longevity and efficacy of your ceiling installation. Periodically dust the tiles and inspect the grid for any signs of wear or damage. For locations with high humidity, opt for moisture-resistant tiles and frames to prevent degradation over time. Should any panel or grid part become compromised, having spare materials on hand can facilitate swift replacements, maintaining your installation's pristine condition. Conclusion Mastering the ceiling tile grid installation process requires dedication and attention to detail. By methodically preparing and executing each phase, from product selection to final inspection, you can achieve a lasting and professional finish. Whether enhancing an office environment or revamping a residential space, each step furthers your expertise, bolstering your authority as a trusted advisor in interior architectural installations.
Next:
Latest news
-
Revolutionizing Interior Design with Ceilings t grid Suspended SystemNewsOct.29,2024
-
Revolutionizing Ceiling Design with ceiling access panel with Gypsum Tile WaterproofNewsOct.29,2024
-
Revolutionizing Interior Design with PVC Gypsum Ceiling: A Comprehensive GuideNewsOct.29,2024
-
Elevating Interior Design with High quality Mineral Fiber Ceiling TilesNewsOct.29,2024
-
Revolutionizing Interior Design with PVC Gypsum Ceiling: A Comprehensive GuideNewsOct.29,2024
-
Elevating Interior Design with High-Quality Mineral Fiber Ceiling Tiles: A Comprehensive GuideNewsOct.29,2024


