8 月 . 07, 2024 15:05 Back to list
A Comprehensive Guide to Constructing an Easy-to-Access Ceiling Access Panel
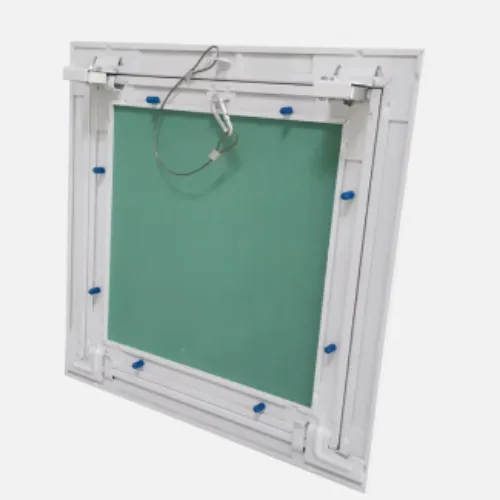
How to Make a Ceiling Access Panel
Creating a ceiling access panel can be a valuable addition to your home, allowing easy access to plumbing, electrical systems, or ductwork. Whether you're performing repairs or upgrades, having an access point can save you time and effort. This article provides a step-by-step guide to constructing a ceiling access panel that is both functional and aesthetically pleasing.
Materials and Tools Needed
Before you begin, gather the necessary materials and tools
Materials - Sheet of plywood or drywall (thickness depends on your ceiling material) - Hinges (ideally concealed or piano hinges) - Screws - Wood glue (optional) - Paint or finish (to match the ceiling)
Tools - Measuring tape - Pencil - Saw (circular or reciprocating saw) - Screwdriver - Level - Paintbrush or roller (if finishing)
Step-by-Step Instructions
1. Determine Size and Location - Identify the area of your ceiling that requires access. Measure the space to determine the appropriate size for your access panel. A typical panel size is around 14 inches by 14 inches, but adjust according to your needs. Ensure the panel does not interfere with any structural elements or wiring.
how to make a ceiling access panel

2. Cut the Opening - Using a pencil, mark the dimensions of the access panel on the ceiling. Double-check measurements to ensure accuracy. Use a drywall saw or a reciprocating saw to cut along your marked lines. Be cautious of any hidden electrical wires or plumbing that may be in the ceiling.
3. Create the Panel - Cut a piece of plywood or drywall to the same dimensions as the opening you just created. Sand the edges to ensure a smooth finish. This will be your access panel.
4. Install Hinges - Attach the hinges to one side of the panel using screws. Make sure they are secured tightly and that the hinges are flush with the edge of the panel. Position the opposite side of the hinges along the edge of the opening in the ceiling.
5. Secure the Panel - With the hinges fixed in place, lift the panel into the opening and attach the other side of the hinges to the ceiling. Use a level to ensure the panel sits evenly. If desired, you can add a latch or magnet to keep the panel securely closed when not in use.
6. Finish the Panel - Once the access panel is installed, consider painting or finishing it to match the surrounding ceiling. This gives a more cohesive look and can help the panel blend seamlessly into the room’s design. Allow the paint to dry completely before using the panel.
7. Test the Access - Open and close the panel several times to ensure it operates smoothly. Make any adjustments necessary to the hinges or latch to achieve the desired functionality.
Conclusion
Constructing a ceiling access panel is a straightforward DIY project that can enhance the accessibility of important systems in your home. By following the steps outlined above, you can create a panel that not only serves a practical purpose but also maintains the aesthetic integrity of your ceiling. Remember to prioritize safety when working with tools and always double-check for potential hazards like wiring or plumbing before cutting any openings. Enjoy the peace of mind that comes with a well-placed access panel!
-
Revolutionizing Interior Design with Ceilings t grid Suspended SystemNewsOct.29,2024
-
Revolutionizing Ceiling Design with ceiling access panel with Gypsum Tile WaterproofNewsOct.29,2024
-
Revolutionizing Interior Design with PVC Gypsum Ceiling: A Comprehensive GuideNewsOct.29,2024
-
Elevating Interior Design with High quality Mineral Fiber Ceiling TilesNewsOct.29,2024
-
Revolutionizing Interior Design with PVC Gypsum Ceiling: A Comprehensive GuideNewsOct.29,2024
-
Elevating Interior Design with High-Quality Mineral Fiber Ceiling Tiles: A Comprehensive GuideNewsOct.29,2024


